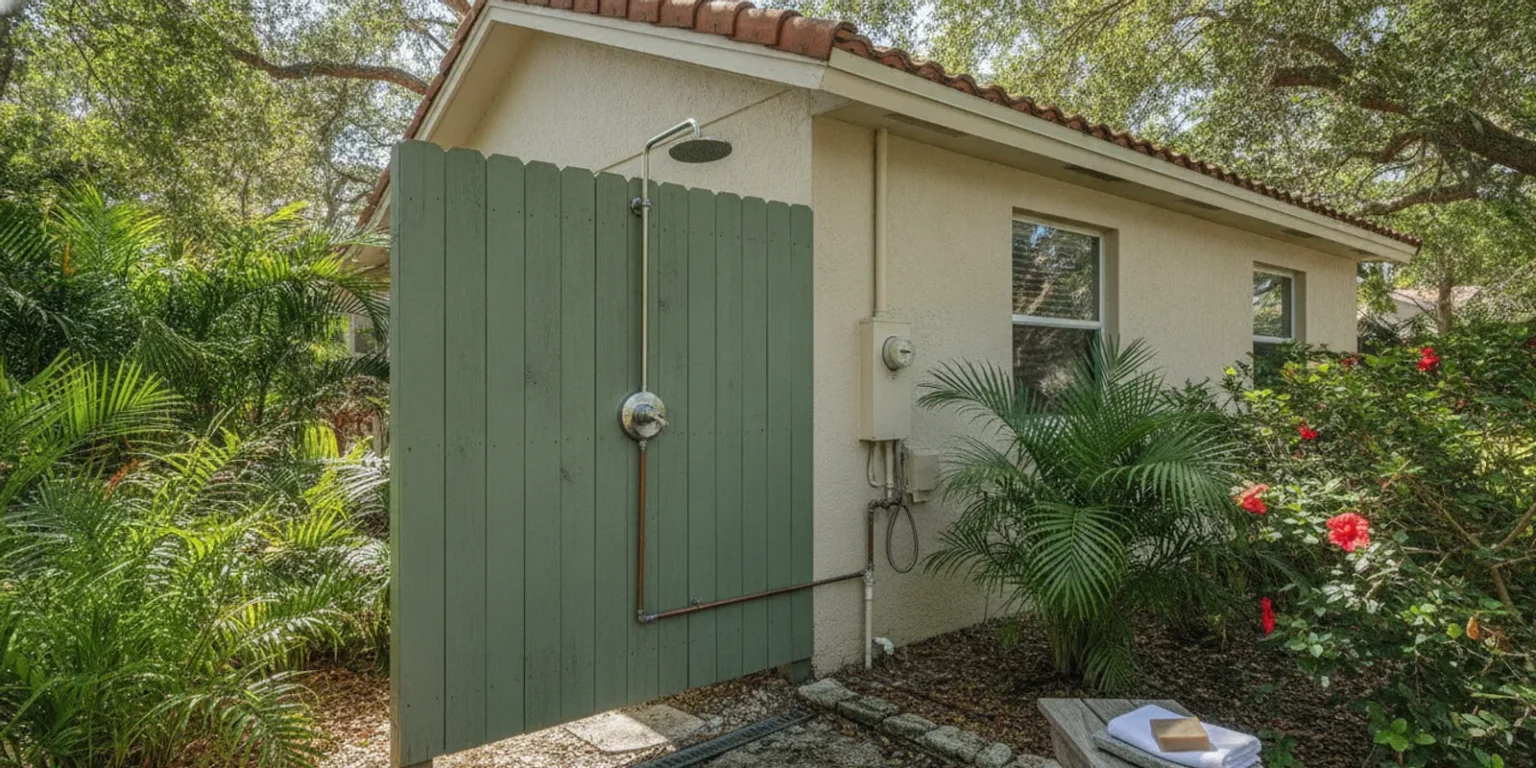
Outdoor shower plumbing can make it easier to rinse off after the beach, pool, or yard work, but a reliable setup takes more than attaching a showerhead to an exterior wall. You need a suitable hot and cold water supply, a drainage plan that follows local requirements, weather-ready materials, and access for maintenance. In Southwest Florida, humidity, sun, salt air near the coast, and heavy rain make those details especially important.
Schedule service or request a free estimate
What should you plan before installing an outdoor shower?
Start by deciding how the shower will be used. A quick rinse station beside a pool has different needs from a private shower used every day. Write down who will use it, whether you need hot water, how much privacy is needed, and where water can drain safely. These choices affect the pipe route, fixture type, surface, and installation cost.
Walk the area after rain and during normal use of the yard. Look for low spots, places where water already pools, nearby doors, windows, walkways, air-conditioning equipment, electrical outlets, and property boundaries. Think about the route from the house to the shower and whether pipes would be exposed, buried, or installed inside a wall. A short, accessible route is often simpler to inspect and service than a long route hidden beneath finished surfaces.
- Choose a practical location. Place the shower near the pool, beach-entry path, or outdoor changing area if possible, but avoid directing spray toward the home or neighboring property.
- Decide whether hot water is worth adding. A cold-water rinse can be simpler. A hot-and-cold shower requires a safe, compatible supply and may need more plumbing work.
- Plan privacy and access. Screens and enclosures should not block a valve, drain cleanout, or other plumbing access point.
- Check drainage and local requirements before construction. Ask the local building or plumbing department what applies to the property and proposed design.
- Set a maintenance plan. Outdoor fixtures need occasional cleaning and inspection, particularly when exposed to direct sun, rain, and coastal air.
Sketch the proposed layout and note approximate distances to the home’s water lines and the intended drainage area. A plumber can use that information to discuss feasible options. It is better to review the layout before buying a fixture or building a permanent enclosure than to discover that a selected location creates a difficult supply route or an unsuitable way to manage wastewater.
How does an outdoor shower get its water?
An outdoor shower is generally supplied from the home’s plumbing system. The right connection depends on the home’s existing pipes, the shower’s location, the fixture’s needs, and whether hot water is required. A professional should determine where to connect, what materials are suitable, and how to protect the supply. Do not assume a nearby hose connection can be treated as a permanent shower supply; a hose bib and a plumbed shower serve different purposes.
Cold-water supply
A cold-only fixture may suit a pool rinse or a quick wash after outdoor work. It can reduce the complexity of the installation, but it still needs a properly planned branch from the plumbing system, a shutoff that can be reached, and an appropriate drainage solution. The fixture should be designed for outdoor use and for the supply conditions at the property.
Consider who will use the shower and when. Water from an untempered cold line can feel uncomfortable, especially during cooler weather. Also consider whether the shower will be used often enough to justify permanent plumbing. Infrequent use may call for a simple layout that is easy to shut off and inspect rather than a complicated fixture with features that will rarely be used.
Hot-and-cold supply
A hot-and-cold shower can be more comfortable, but adding hot water means coordinating with the home’s water-heating system and the route of the hot-water piping. A plumber can assess whether the existing system and pipe path are appropriate. The design also needs a suitable mixing valve or fixture that lets the user control temperature safely.
Temperature control matters outdoors, where a user may step directly under the spray and have less opportunity to adjust quickly. Select a fixture with controls that are easy to operate and have them installed according to the manufacturer’s instructions. Do not bypass or remove temperature-control components to make an installation fit. If the shower will be used by children, older adults, or guests unfamiliar with the controls, keep the operation simple and make sure the hot-water setting can be managed safely.
Pipe route, shutoff, and freeze protection
Some supply piping can be routed through an accessible wall; other layouts may require a longer exposed or underground run. Each option has tradeoffs. Exposed lines are easier to see but face sun, impact, weather, and corrosion risks. Concealed lines can look neater but may be harder to inspect or repair. The route should avoid locations where pipes could be struck by landscaping tools, vehicles, or routine yard work.
Include a shutoff that is accessible without dismantling a screen or deck. It makes it easier to isolate the outdoor fixture for repair or when it is not in use. Ask the installer how to drain or protect the piping during an unusual cold snap. Southwest Florida has a warm climate, but cold weather can still occur; do not assume that outdoor pipes never need protection. The correct approach depends on whether the piping is exposed, how it is installed, and the fixture design.
For a supply assessment or help with a plumbing issue, see Premier Plumbers’ plumbing repair information. A repair page is not a substitute for a design review, so explain that you are considering a new outdoor shower and ask what service is appropriate for the project.
Where should outdoor shower water drain?
Drainage is one of the most important parts of outdoor shower plumbing. Water should not collect against the house, flow across a path where someone could slip, or wash soil and debris into a location where it can cause damage. The correct method depends on the site, the volume of water, the home’s sewer or septic arrangement, and applicable local rules. Never assume that an outdoor shower can drain anywhere simply because it is outside.
Before construction, identify whether the home uses a municipal sewer connection or a septic system. Ask the local building or plumbing department what permits, approvals, or standards apply. If the proposed shower will connect to an existing waste line, have a qualified professional assess the route and connection. If a different drainage approach is being considered, verify that it is allowed for the property before building it. Rules can differ by location and design, so a neighbor’s setup is not proof that the same solution is permitted at your home.
Surface drainage and grading
The floor or ground beneath the shower needs to handle repeated water exposure. A properly designed surface can direct water away from the home and toward an approved drainage point. The finished area should be stable, easy to clean, and not prone to puddling. Sloping the ground by guesswork can send water in the wrong direction, so review the grade as part of the overall plan.
Look at the surrounding landscape as well as the shower floor. Garden beds, mulch, pavers, and edging can change where water travels. Heavy rain may overwhelm a small area that seems adequate during a short rinse. Avoid routing shower water toward a foundation, crawlspace, neighboring lot, public walkway, or other location where it could create a nuisance or hazard. Keep leaves and other debris from blocking the intended flow path.
Drain connection and wastewater
Where a drain is connected to a building’s wastewater plumbing, the connection must be designed for that system and local requirements. The layout may involve a drain body, a trap, venting, pipe sizing, and an approved route. These are not details to infer from the appearance of a floor drain or to improvise with leftover materials. A poorly planned connection can lead to slow drainage, odors, leaks, or a need to open finished surfaces later.
Ask the plumber to explain where the drain will go, how it will be accessed for cleaning, and what happens if the shower is used heavily. If the home has a septic system, make sure the design is reviewed with the appropriate local authority or qualified professional. Do not route soaps or wastewater into a storm drain or a water body unless the responsible authority confirms that the specific arrangement is allowed.
Keep the shower area safe
Choose a surface that provides stable footing when wet. Avoid a layout that leaves a slick film on a walkway or places the controls where a user has to step across a puddle. Make sure water does not splash onto electrical equipment, outdoor outlets, or lighting. If the area will have lighting or electrical components, ask a qualified electrician about safe placement and protection for the outdoor environment.
Think about runoff after the shower has been off for several minutes. If water remains pooled, drains slowly, or reaches the house, stop using the shower until the cause is understood. Adding gravel, a larger drain, or a new connection without knowing the underlying problem can shift water to another part of the property rather than solve it.
Which outdoor shower fixtures and materials make sense?
Outdoor fixtures are exposed to conditions that indoor fixtures do not face in the same way. Sunlight, rain, humidity, airborne salt near the coast, and contact with lawn or pool chemicals can wear surfaces and seals. Look for products rated or recommended for outdoor use, and follow the manufacturer’s care and installation guidance.
Material selection is not only about appearance. Different metals and finishes have different care needs and may respond differently to the local environment. Ask the supplier or installer whether the chosen fixture is appropriate for the location, especially for a home close to the coast. Avoid mixing incompatible materials without professional guidance, since connections can corrode or deteriorate depending on the combination and water conditions.
- Showerhead: Choose a head that can be cleaned and serviced. A simple design may be easier to maintain than one with small, intricate openings.
- Controls: Select a valve and handle arrangement that is intuitive, accessible, and compatible with the planned hot-water supply.
- Exposed trim: Ask about the finish’s outdoor care requirements and whether the product is intended for coastal conditions.
- Supply piping: Use materials and fittings selected for the installation and local conditions, not whatever happens to be available in a garage.
- Drain and surface: Choose parts that can be inspected and cleared, and pair them with a floor or ground treatment that stays safe when wet.
Privacy screens, benches, hooks, and shelves can make the shower more useful, but they should not conceal valves, unions, access panels, or cleanouts. Plan those elements with the plumbing rather than installing them first and covering the pipes afterward. If a fixture needs service, easy access can reduce disruption and help a technician identify the issue.
Can you install outdoor shower plumbing yourself?
A homeowner may be able to handle some non-plumbing work, such as comparing fixture styles, clearing vegetation, or planning the privacy screen. Connecting the shower to the home’s water supply or wastewater system is a different matter. Those tasks can involve local code, permits, water-pressure considerations, temperature control, drain design, and concealed piping. Requirements vary, so check with the local building department before starting work and use a licensed plumbing professional when the work requires one.
DIY mistakes can be difficult to spot at first. A small leak behind an exterior wall may go unnoticed until there is damage. An undersized or poorly routed drain may work during a brief test but struggle with regular use. A valve installed incorrectly can make temperature adjustment unpredictable. A connection that is not approved for the application may fail or be rejected during inspection.
If you are comparing bids or discussing a project, ask direct questions:
- What permits or inspections may apply to this particular installation?
- Where will the hot and cold lines connect, and how will they be shut off?
- How will the hot water be controlled at the shower?
- Where will wastewater go, and is that method approved for this property?
- How can the drain, valve, and other serviceable parts be reached later?
- What materials and fixture care does the manufacturer recommend for outdoor use?
- What parts of the proposed scope are included in the estimate, and what conditions could change it?
Ask for the answers in plain language before work begins. The goal is not simply to have water come out of a showerhead; it is to have a complete installation that supplies water, controls temperature, drains appropriately, and can be maintained.
How do you maintain an outdoor shower?
Regular, simple checks help catch wear before it becomes a larger problem. How often to inspect depends on use and exposure. A shower used every day beside a pool may need more frequent attention than a rinse station used occasionally. Follow the fixture manufacturer’s care instructions and avoid harsh cleaners that could damage a finish or seal.
After frequent use
- Rinse away sand, soil, sunscreen residue, and pool chemicals from the fixture and surrounding surface.
- Check whether water drains away promptly rather than collecting around the base or against the home.
- Look for drips at the showerhead, controls, and visible pipe connections after turning the water off.
- Keep leaves, hair, and debris from accumulating over the drain or drainage area.
- Make sure hooks, shelves, and screens do not shift into the controls or obstruct access.
Occasionally and after severe weather
Inspect visible piping and supports for movement, cracking, corrosion, or impact damage. Check that the shutoff still turns as intended, without forcing a stiff or damaged valve. Examine caulk and sealant where the installation meets a wall, but do not use sealant to conceal an active leak or a loose connection. After heavy rain, confirm that runoff has not changed direction or created standing water around the shower.
If the area is near the coast, follow the fixture manufacturer’s recommendations for rinsing and cleaning exposed finishes. Salt and moisture can speed deterioration of some materials. Keep landscaping trimmed so plants do not trap moisture against fittings or make inspection difficult. If a cold snap is forecast, use the protection and draining steps recommended for the specific piping layout rather than guessing at a procedure.
What common outdoor shower problems should you watch for?
Small symptoms often help identify a problem before the shower becomes unusable. Keep track of when the issue happens, whether it affects other fixtures, and whether there are visible signs such as pooling or dampness. That information can help a plumber diagnose the cause.
| Symptom | Possible issue | What to do |
|---|---|---|
| Water pools around the shower | Blocked drainage, inadequate slope, or a drainage route that cannot keep up | Pause use if water approaches the home or creates a slipping hazard; have the drainage plan checked. |
| Drip continues after shutoff | Worn or damaged fixture parts, or a valve that is not closing fully | Check the visible fixture and shutoff; arrange repair if the drip persists. |
| Weak or uneven spray | Debris at the showerhead, a supply restriction, or another plumbing issue | Clean only as the manufacturer permits; seek help if other fixtures are affected or pressure remains low. |
| Musty smell or damp wall | Standing water, a leak, or moisture trapped behind an enclosure | Stop using the shower if a leak is suspected and have the source inspected. |
| Hot water fluctuates | Fixture, mixing valve, supply, or water-heater issue | Avoid using the shower until temperature control is reliable; have the system assessed. |
| Visible corrosion or loose piping | Material wear, movement, or damaged support | Do not force or conceal the part; arrange an inspection and repair. |
These symptoms do not point to a single guaranteed cause. For example, weak spray could come from the showerhead, a valve, a supply line, or a broader issue in the home. If several fixtures show low pressure or temperature changes, tell the plumber; that may indicate the issue is not limited to the outdoor shower.
How should you choose between a simple rinse station and a full shower?
Not every outdoor rinse area needs the same fixture or construction. Matching the design to the way your household will use it can keep the project manageable and reduce features that are difficult to maintain. Consider the tradeoffs before committing to a permanent layout.
- Cold-water rinse station: This can suit occasional rinsing after swimming or yard work. It has fewer hot-water components, but the water may feel cold and the fixture still needs a compliant supply and drainage plan.
- Hot-and-cold shower: This provides more temperature choice and may be more comfortable for regular use. It adds a hot-water route and temperature-control considerations, so confirm that the existing system and layout can support it.
- Open fixture: A simple fixture without a full enclosure can be easier to clean and inspect. It offers less privacy and may expose the plumbing to more sun, rain, and accidental impact.
- Enclosed shower: A screen can offer privacy and help define the shower area. It must still allow ventilation and provide access to valves, piping, and drains. Avoid trapping moisture or making service parts inaccessible.
Also think about how the outdoor shower will affect daily routines. A fixture near a pool gate may be convenient for a quick rinse, while a more private location may work better for regular use. Keep the path from the shower to the home safe when wet and consider where towels or clothing can be kept without blocking the plumbing. If the shower is intended for guests, choose controls that are easy to understand and label hot and cold handles clearly where appropriate.
Use a simple site plan to compare options. Mark the existing water lines, proposed fixture, drainage route, nearby structures, and any areas that should remain dry. Then ask a professional or local authority to review the supply and drainage approach before investing in screens, paving, or decorative finishes. This order can help avoid paying to undo landscaping or construction because the original plumbing route was not practical.
How much does outdoor shower plumbing cost?
There is no useful one-size-fits-all price for an outdoor shower because the work varies from one property to another. A basic cold-water rinse station with nearby supply access is different from a private, hot-and-cold shower that needs a long pipe route, new drainage, surface construction, or changes to finished areas. Any price should be based on the actual scope and conditions at the home.
Factors that can affect an estimate include:
- Distance to water lines: A longer route or difficult access can add work and materials.
- Hot-water connection: Adding a hot supply and suitable temperature controls may require more steps than a cold-only fixture.
- Wastewater plan: The drain route and local requirements can influence the design and labor.
- Existing surfaces: Cutting into walls, paving, or landscaping and then restoring those areas can affect project scope.
- Fixture and enclosure choices: Product selection, privacy structures, and the surrounding floor are separate design choices that may add to the project.
- Access and inspection: Tight spaces, hidden lines, or required inspections can change the sequence of work.
When asking for an estimate, describe the intended use and share photos of the proposed location, nearby water connections, and drainage area if available. Ask whether the estimate includes the fixture, supply work, drain work, permits, surface restoration, and cleanup, or only selected portions. Clarify what is not included. Premier Plumbers quotes plumbing jobs individually; request a current estimate for the conditions at your property rather than relying on a general online figure.
When should you call a plumber?
Get professional help if you need to connect new supply or drain piping, if a valve leaks, if water appears in a wall, or if the shower drains slowly despite a clear surface. A plumber can also help assess whether an existing hot-water system and pipe route are suitable for an outdoor fixture. If the problem involves electrical equipment, contact a qualified electrician as well.
Stop using the shower while you investigate any active leak, recurring puddle near the house, unstable temperature, exposed damaged pipe, or sewage odor. Do not open walls, cap unknown pipes, or pour harsh chemicals into a drain to guess at a solution. Note what you observe and when it occurs. A picture of the fixture, visible lines, and the affected area can make the first conversation more productive.
For information about the company’s plumbing work, visit the plumbing services overview. To discuss a project or request service, use the contact page. Service availability can depend on the address; call to confirm if you are near the edge of the service area or do not see your community listed.
Request a free estimate for your plumbing project
Outdoor shower plumbing: key points to remember
A dependable outdoor shower starts with a location, supply, and drainage plan that fit the home and local requirements. Choose outdoor-appropriate fixtures, keep shutoffs and service parts accessible, and check visible components for leaks, corrosion, and drainage problems. When the project involves a new water or wastewater connection, ask the local authority what applies and have a qualified plumber assess the installation before construction. A little planning helps keep the shower practical, comfortable, and easier to maintain.