Why Proper Plumbing Installation Matters for Every Florida Home
Plumbing installation is the process of designing, routing, and connecting pipes, fixtures, and water systems throughout a home, from underground sewer lines to the faucets you use every day.
Here’s a quick overview of what home plumbing installation involves:
- Underground rough-in: laying drain, waste, and vent (DWV) pipes beneath the slab before concrete is poured
- Above-ground rough-in: running water supply lines and vent pipes through walls and floors after framing
- Trim-out (finishing phase): installing toilets, sinks, faucets, and appliances once walls are complete
- Permits and inspections: required at each stage to meet local building codes
- Testing: pressure tests on supply lines and flow tests on drains before walls are closed
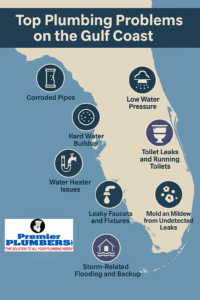
Plumbing is easy to ignore until something goes wrong. A 2024 HomeServe survey found that 3 out of 4 U.S. homeowners experienced a home repair emergency in the past year, and plumbing problems ranked among the most common causes. In Florida’s climate, where heat and humidity put constant stress on pipes and fixtures, a system that wasn’t installed correctly from the start can lead to leaks, sewer backups, or water damage that costs far more to fix than it would have to prevent.
Whether you’re building new, remodeling a bathroom, or trying to understand what your contractor is doing behind your walls, knowing how plumbing installation works puts you in control.
At Premier Plumbers, our licensed team brings a three-generation plumbing legacy and decades of hands-on experience to residential and commercial plumbing installation across Southwest Florida. In this guide, we’ll walk you through everything you need to know, from the first pipe in the ground to the final fixture on the wall.

The Three Phases of New Construction Plumbing Installation

When we build a new home or execute a major remodel in Florida, we don’t just show up with a truckload of pipes and start gluing things together. A successful plumbing installation follows a strict construction timeline. This sequential process ensures that structural elements, electrical wiring, HVAC ductwork, AC equipment, and drywall don’t get in the way of vital water and waste lines.
The entire process is broken down into three distinct phases: the underground rough-in, the above-ground rough-in, and the final trim-out.
Phase 1: Underground Rough-In Plumbing Installation
In Florida, slab-on-grade foundations are the standard. This means the very first phase of your plumbing system is permanently buried beneath inches of solid concrete.
During the underground rough-in, we lay out the main drain, waste, and vent (DWV) system, establish the primary sewer lines, and position the main water supply lines. Because soil conditions in coastal Florida can range from loose sand to wet mud, excavation requires precision. Sand is highly prone to cave-ins, while wet ground conditions make joining pipes a challenge.
Every single pipe must be sloped precisely so gravity can carry waste out of the home. Before any concrete is poured, we perform rigorous pressure testing, filling the lines with water or air to ensure there are absolutely zero leaks.
If a mistake is made here, fixing it later requires jackhammering up your brand-new concrete foundation. That is why we rely on advanced video sewer inspections to verify pipe integrity before the slab is poured, and we offer professional sewer replacement services for older homes facing underground line failures.
Phase 2: Above-Ground Rough-In Plumbing Installation
Once the foundation slab is cured and the wood or steel framing is complete, we move to the above-ground rough-in phase (also known as the top-out or stack-out stage). This occurs before any drywall, insulation, or flooring is installed.
During this phase, we run the water supply lines, drain lines for upper floors, and vent pipes through the wall studs and ceiling joists. This is where we install the skeleton of your home’s water distribution network. We typically run flexible, durable PEX tubing for water supply lines and rigid PVC or ABS pipes for the DWV system.
We also coordinate closely with HVAC technicians and electricians to ensure our pipes do not conflict with ductwork, AC equipment, A/C lines, or electrical runs. If you are updating an older Florida home with deteriorating pipes, this rough-in stage is essentially what we perform during a whole home re-piping project to restore water pressure and safety.
Phase 3: The Finishing and Trim-Out Phase
The finishing or trim-out phase takes place at the very end of the construction process. Once the drywall is hung, painted, and the cabinets and countertops are securely in place, we return to the site to install the visible components of your system.
During this final step, we connect:
- Toilets, sinks, and faucets
- Showers, bathtubs, and trim kits
- Major water-using appliances, including dishwashers, washing machines, and water heaters
We install individual shut-off valves for each fixture, which allows you to isolate water flow to a single sink or toilet if a leak ever occurs. Finally, we conduct a comprehensive system-wide test. We often use a manometer, which acts like a highly sensitive pressure monitor, to ensure the entire system is airtight and watertight.
If you are looking for design inspiration or want to choose high-quality fixtures for your home, we invite you to explore our plumbing fixtures showroom. We also provide specialized installation for toilets and fixtures Sarasota residents trust for maximum water efficiency.
Planning, Permits, and Code Compliance
A professional plumbing installation is heavily regulated by local building codes to protect public health and safety. In Florida, all work must comply with the Florida Building Code, which incorporates strict guidelines for backflow prevention, sanitary drainage, water conservation, and vent sizing.
Before any major plumbing work begins, a permit must be pulled from the local municipality, whether you are in Sarasota, Tampa, Bradenton, or Fort Myers. Skipping permits might seem like a way to save time or money, but it removes a vital layer of protection.
Local building inspectors will visit the job site at least twice: once after the rough-in phase to inspect the open walls and slab, and once after the trim-out phase to verify the completed work. Working with a verified, licensed local plumbing team helps ensure your installation is completed correctly and meets the regulations for your municipality.
Finalizing Fixture Locations Before Rough-In
One of the most critical steps in the planning phase is locking in your fixture and faucet locations on the architectural blueprints before any physical work begins.
Because plumbing supply and drain lines are rigid and framed into the structure of your home, changing your mind after the rough-in phase is incredibly expensive. For example:
- Toilets: Standard residential toilets require a rough-in distance of exactly 12 inches from the finished wall. If your framing or drywall thickness isn’t calculated correctly, the toilet won’t fit, or it will sit too far out into the room.
- Kitchen Islands: Running water and drain lines to a kitchen island sink requires cutting paths through concrete slabs. This must be planned perfectly before the slab is poured.
- Specification Sheets: Always provide your plumber with the exact manufacturer “spec sheets” for your chosen sinks, tubs, and showers before rough-in. A freestanding tub requires completely different drain and valve positioning than a standard alcove tub.
Materials, Costs, and System Types
Selecting the right materials and understanding the costs involved are crucial steps in planning your project. Modern plumbing systems rely on a variety of plastics and metals, each suited for specific applications.
| Pipe Material | Common Application | Pros | Cons |
|---|---|---|---|
| PEX (Cross-linked Polyethylene) | Water supply lines | Highly flexible, resists scale and freeze cracking, fewer joints needed | Cannot be used outdoors (sensitive to UV light) |
| Copper (Rigid) | Water supply & distribution | Extremely durable, naturally antimicrobial, resists corrosion | Expensive, labor-intensive to install (requires soldering) |
| PVC (Polyvinyl Chloride) | Drain, waste, & vent (DWV) | Inexpensive, smooth interior prevents blockages, easy to join | Can become brittle over time if exposed to extreme heat |
| ABS (Acrylonitrile Butadiene Styrene) | Underground DWV lines | High impact strength, performs well in cold soils | Not allowed by some local codes; noisier than PVC |
| CPVC (Chlorinated PVC) | Hot & cold supply lines | Handles higher temperatures than standard PVC, easy to install | Can become brittle with age; less flexible than PEX |
To help you manage the financial side of your project, we offer flexible financing options to fit your budget.
Plumbing Installation Cost Factors
How much does a professional installation cost? For new construction in Florida, a complete plumbing system typically ranges from $4 to $15+ per square foot.
Here is how those costs are generally distributed:
- Standard New Construction: $4 to $8 per square foot. For a standard 2,000 sq. ft. home with 2.5 bathrooms and mid-range fixtures, the core plumbing work typically falls between $10,000 and $14,000.
- Major Remodels: $6 to $14 per square foot. Remodeling is often more expensive per square foot than new construction because it involves demolition, routing pipes through existing structures, and matching old systems with new materials.
- High-End/Luxury Builds: $15+ per square foot. Custom layouts, multiple shower heads, wall-mounted faucets, and high-end fixtures significantly increase both material and labor costs.
Choosing the Right Pipe Materials
While budget is always a factor, choosing the right material for the job ensures your system remains reliable for decades.
We highly recommend PEX for indoor water supply lines because its flexibility allows us to run long, continuous lines without joint connections behind your walls, drastically reducing the risk of hidden leaks. For DWV systems, PVC remains the gold standard in Florida due to its resistance to the corrosive elements found in our coastal soil and water.
Residential vs. Commercial Plumbing Systems
There are significant differences between residential and commercial installations. Residential plumbing is designed for moderate, predictable use by a single family. Commercial plumbing, on the other hand, must support high-volume usage, multi-story structural demands, and stricter health codes.
Commercial systems require larger pipe diameters, heavy-duty fixtures, complex backflow preventers, and sophisticated venting systems to handle high pressure. For commercial or residential plumbing assistance in the Tampa Bay area, working with a licensed local team helps ensure the system is designed, installed, and inspected correctly.
Common Mistakes, Maintenance, and FAQs

Even minor errors during a plumbing installation can lead to major headaches down the road. Let’s look at how to avoid common mistakes and keep your system running smoothly.
Homeowner Mistakes to Avoid
When homeowners attempt to tackle plumbing projects themselves, they often run into several common pitfalls:
- Poor Venting: Every drain needs air to flow smoothly. Without proper venting, water drains slowly, pipes gurgle, and sewer gases can back up into your home.
- Incorrect Slope: Drain pipes must slope downward at a rate of 1/4 inch per foot. If the slope is too steep, liquid drains too fast, leaving solids behind to cause clogs. If the slope is too shallow, nothing moves.
- Skipping Permits: Doing unpermitted work can make it difficult to sell your home in the future and may even void your homeowner’s insurance policy.
- Hiring Unlicensed Workers: Unlicensed handymen often lack the training to meet complex building codes, leading to poor workmanship and code violations. If you run into issues from a previous bad installation, we provide expert plumbing repairs to get your system back up to code.
A well-installed system is easier to maintain when homeowners understand how clogs form and when a drain issue needs professional tools. For example, our guide on how to stop the clog with professional 24 hr drain service explains when stubborn blockages call for emergency service, while our drain cleaning team can clear problem lines without relying on harsh chemicals that may damage pipes.
Maintenance and Winterization Best Practices
To keep your plumbing system in peak condition, establish a regular maintenance routine:
- Locate Your Main Shut-Off: Make sure everyone in your household knows where the main water shut-off valve is located so they can turn off the water quickly in an emergency.
- Inspect for Leaks: Check under your sinks and around your appliances once a month for any signs of moisture.
- Professional Drain Maintenance: Avoid chemical drain cleaners, which can corrode your pipes. Instead, schedule professional drain maintenance to keep your waste lines clear.
- Water Heater Care: Flush your water heater annually to remove sediment buildup and maintain efficiency. If you need a replacement or upgrade, we install both traditional and tankless water heaters.
- Florida Winterization: While we rarely see hard freezes in Southwest Florida, seasonal residents should turn off their main water supply, drain the lines, and wrap exposed outdoor pipes and backflow preventers before leaving for the summer to prevent issues while away.
Water heaters, shut-off valves, and exposed supply lines are often installed during the final trim-out, so it helps to know how those components behave after the home is occupied. Our comprehensive guide to water heater repair walks through warning signs like inconsistent hot water, leaks, and sediment buildup that can affect long-term system performance.
When should I hire a licensed professional instead of attempting DIY plumbing?
You can easily handle simple tasks like changing a showerhead or replacing a faucet aerator yourself. However, you should always leave major installations, whole-home re-piping, slab work, and water heater installations to licensed professionals.
Working with pressurized water lines, gas connections, and structural drains requires specialized tools, training, and code compliance. If a DIY project goes wrong, it can quickly turn into a costly emergency. When that happens, our team is always ready to assist with rapid emergency plumbing services.
How long does a typical home plumbing installation take?
For a standard single-family home, the rough-in phase typically takes two to four days of on-site work. The final trim-out and fixture installation phase usually takes one to two days.
These timelines do not include the time required for permit approvals, concrete curing, framing, or waiting for local municipal inspections.
What is the purpose of a vent pipe in a DWV system?
A vent pipe extends from your drain system up through the roof of your home. It serves two main purposes:
- It introduces fresh air into the drain pipes, which maintains the atmospheric pressure needed for water to flow smoothly without creating a vacuum.
- It allows sewer gases to escape safely outside your home rather than backing up into your living spaces.
Conclusion
A high-quality plumbing installation is the foundation of a safe, comfortable, and efficient home. By understanding the three phases of construction, selecting the right materials, and working with licensed professionals, you can protect your investment and enjoy reliable water flow for decades to come.
At Premier Plumbers, we carry forward a proud three-generation legacy of plumbing excellence across Southwest Florida. Whether you are in Sarasota, Bradenton, Tampa, Fort Myers, or Naples, our family-owned team is here to deliver top-tier workmanship and honest, reliable service.
Ready to start your next project? Contact our professional plumbing installation technicians today to schedule your consultation!