Cold Showers Are Trying to Tell You Something
Water heater element replace is a repair most Florida homeowners can do themselves in 4 to 6 hours for as little as $10 to $60 in parts.
Here’s a quick overview of the process:
- Turn off power at the circuit breaker
- Test the element with a multimeter (a reading of 10–16 ohms is normal)
- Drain the tank using a garden hose
- Remove the old element with a 1.5-inch socket wrench
- Install the new element with a fresh gasket, matching the original voltage and wattage
- Refill the tank completely before restoring power
- Run a hot faucet for 3 minutes to purge air, then check for leaks
That’s the short version. Keep reading for the full step-by-step guide, safety tips, and Florida-specific advice.
If you woke up to a cold shower this morning, you’re not alone. A failed heating element is one of the most common reasons electric water heaters stop doing their job. The good news? It’s usually a straightforward fix, and one that can save you hundreds of dollars compared to calling a professional or replacing the entire unit.
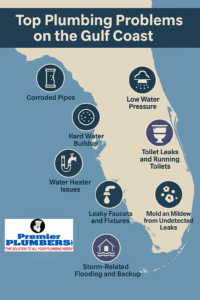
Most residential electric water heaters have two heating elements: an upper and a lower. When one burns out, you’ll feel it fast: lukewarm water, a tank that runs out in minutes, or a circuit breaker that keeps tripping. Elements typically last 6 to 15 years, but hard water, which is common throughout Southwest Florida, can cut that lifespan significantly shorter.
At Premier Plumbers, our experienced water heater team handles water heater element replace jobs across Southwest Florida every week. This guide explains what you’re dealing with, what a safe replacement involves, and when it makes sense to call in a pro.

Signs and Testing for a Water Heater Element Replace
Before you start tearing things apart, you need to confirm that the element is actually the culprit. Your water heater is like a giant electric kettle; when the “coils” (elements) fail, the water stays chilly. But how do you know which one is dead?
Lukewarm Water: If your water is warm but never gets hot, the upper element has likely failed. The upper element is the “priority” heater; it heats the top of the tank first so you have hot water quickly. Quick Hot Water Depletion: If you have plenty of hot water for five minutes but then it turns ice cold, your lower element is probably gone. The lower element is the “workhorse” that maintains the bulk of the tank’s temperature. Tripped Circuit Breaker: If your element has a short circuit, it will draw too much power and trip your home’s breaker. If you flip the breaker back on and it immediately pops again, you have a hardware failure.
If your old unit keeps running longer, producing inconsistent hot water, or driving up utility costs, the issue may go beyond one burned-out element. Our water heaters service team can inspect the system, confirm whether a repair is worthwhile, and explain your options for conventional or tankless water heater service.
For homeowners weighing repair against replacement, why your current water heater is tanking your savings explains how aging equipment, sediment, and efficiency losses can affect monthly utility bills.

Testing with a Multimeter
The only way to be 100% sure is to test for “continuity” or resistance using a multimeter. Turn off the power (this is critical!), remove the access panel, and disconnect at least one of the wires from the element. Set your multimeter to the lowest Ohms (Ω) setting.
| Element Wattage | Expected Resistance (Ohms) |
|---|---|
| 3,500W | 15–16 Ohms |
| 4,500W | 12–13 Ohms |
| 5,500W | 10–11 Ohms |
If your multimeter reads “0” or “Infinity” (often shown as O.L. on digital screens), the element is broken internally and needs a water heater element replace. You should also check for a “short to ground” by touching one probe to an element screw and the other to the metal tank itself. Any reading other than zero indicates a dangerous short.
Tools Required for Water Heater Element Replace
You don’t need a truck full of professional gear, but having the right wrench is the difference between a 10-minute job and a 2-hour struggle.
- 1.5-inch Socket or Element Wrench: Standard wrenches often slip on the thin hex head of an element. A dedicated 1.5-inch deep socket or a cheap “element wrench” from the hardware store is a must.
- Multimeter: For testing voltage and resistance.
- Garden Hose: To drain the tank.
- Phillips Screwdriver: To remove the access panels.
- Work Gloves: To protect your hands from sharp metal edges and hot water.
Safety Precautions for Water Heater Element Replace
Working on a water heater involves two things that don’t mix well: electricity and water. Safety isn’t just a suggestion; it’s a requirement.
- The Double-Pole Breaker: Water heaters typically run on 240 volts. This means they are connected to a “double” breaker in your panel, usually 30 or 40 amps. Make sure it is completely OFF.
- Verify with a Tester: Use a non-contact voltage tester or your multimeter to ensure there is zero power at the heating element terminals before you touch them.
- Cooling Time: If your heater was recently working, the water inside is scalding. Let it cool for a few hours, or run the hot water faucet until the water coming out is cool before you start draining the tank.
Step-by-Step Guide to Replacing Your Heating Element
Now that you’ve confirmed the failure and gathered your tools, it’s time to get to work.

1. Draining the Tank
You cannot unscrew an element while the tank is full, or you’ll have a 50-gallon flood in your garage or laundry room. Attach a garden hose to the drain valve at the bottom of the heater. Run the other end to a floor drain or outside.
Pro Tip: Open a hot water faucet somewhere in the house, such as a bathtub. This lets air into the tank, which breaks the vacuum and allows the water to drain much faster. This step is also a good time to remove sediment, and why flushing your water heater matters explains how routine flushing helps protect the tank and heating elements.
2. Access and Removal
Remove the metal access panels and pull back the insulation. You’ll see a plastic “personnel protector” covering the thermostat and element; snap that off. Disconnect the two wires from the element screws.
Use your 1.5-inch socket to unscrew the element. It might be stubborn due to mineral buildup, also called calcification. If it won’t budge, you can use a “breaker bar” for extra leverage. Once it’s loose, unscrew it the rest of the way by hand and pull it out. Be prepared for a little bit of water to splash out.
3. Preparation and Installation
Take your new element and ensure it matches the wattage and voltage of the old one, usually 4500W/240V.
- Clean the Threads: Use a small wire brush or a rag to clean the threads on the tank.
- Lubricate the Gasket: A tiny drop of dish soap on the rubber gasket helps it seat perfectly without bunching up.
- Hand Tighten First: Always start the threads by hand. If you use a wrench immediately, you risk “cross-threading,” which can ruin your entire water heater tank.
- Final Snug: Once hand-tight, use the socket to give it a firm snug. You don’t need to be a bodybuilder here; just make it tight enough to compress the gasket.
4. The Critical Refill
NEVER turn the power back on yet. If you turn on the power while the element is in an empty tank, it will “dry fire” and burn out in less than 30 seconds.
Close the drain valve and turn the cold water supply back on. Keep that bathtub faucet open. You’ll hear air hissing out. Once a steady stream of water with no air bubbles or “spitting” flows from the faucet for at least 3 minutes, your tank is full. Check the element for leaks. If it’s dry, replace the covers and flip the breaker back on.
Maintenance Tips for Florida Homeowners
Living in places like Naples, Sarasota, or Fort Myers means dealing with unique water conditions. Florida’s groundwater is often rich in calcium and magnesium, leading to “hard water.”
Hard Water and Sediment
In Southwest Florida, sediment is the #1 enemy of heating elements. As minerals settle at the bottom of the tank, they bury the lower element. This causes the element to overheat and “cook” the sediment, eventually leading to a burnout.
If you live in Collier County or Lee County, regular flushing can help extend the life of your elements. Why flushing your water heater is essential for homes in Naples, Fort Myers, and Bonita Springs explains why annual maintenance matters in hard-water areas.
Low-Watt Density Elements
When you go to the store for a water heater element replace, look for “Low-Watt Density” or “Fold-back” elements. These have more surface area, which means they operate at a lower temperature to heat the same amount of water. They are much more resistant to mineral buildup and are highly recommended for our coastal Florida environment.
Anode Rod Inspection
While you have the tools out, check your anode rod. This is a sacrificial metal rod that “eats” corrosion so your tank doesn’t have to. If the rod is depleted, your elements and tank are next.
For homeowners dealing with frequent breakdowns or an older tank, Premier Plumbers can also help with Tampa water heater replacement when repair is no longer the best investment.
Frequently Asked Questions about Heating Elements
Do I need to replace both the upper and lower elements at the same time?
While you only need to replace the broken one, we usually recommend replacing both. Elements are cheap ($10–$30), and since they are the same age and have lived in the same water conditions, the second one is likely to fail soon after the first. Replacing both saves you from having to drain the tank again in six months.
Can I change a water heater element without completely draining the tank?
For the upper element, you only need to drain the tank about 1/3 of the way. For the lower element, you must drain it almost completely. Some people try the “vacuum trick” (creating a vacuum to hold water in while swapping quickly), but we don’t recommend this for DIYers — it usually results in a very wet floor and a lot of frustration.
What is “dry fire” and how do I prevent it during installation?
Dry fire occurs when the heating element is powered on without being submerged in water. Without water to dissipate the heat, the element reaches thousands of degrees and melts its internal wiring almost instantly. To prevent this, always ensure water is flowing steadily from a hot water tap for several minutes before restoring power at the breaker.
Conclusion
A water heater element replace is a satisfying DIY project that can restore your home’s comfort in just a few hours. By following the steps above, especially the safety protocols and the refill procedure, you can save yourself a significant amount of money and extend the life of your appliance.
However, we know that life is busy, and electrical repairs aren’t for everyone. If you’re dealing with a stuck element, a leaking tank, or you’d just rather have a professional handle it, Premier Plumbers is here to help. We are a family-owned, three-generation plumbing company with deep roots in Florida.
We proudly serve the following areas:
- Sarasota & Manatee Counties: Sarasota, Bradenton, Venice, Lakewood Ranch, Palmetto, Osprey, Nokomis, Siesta Key, and Longboat Key.
- Lee & Collier Counties: Fort Myers, Naples, Cape Coral, Bonita Springs, Estero, Sanibel, Marco Island, and Lehigh Acres.
- Hillsborough & Charlotte Counties: Tampa, Port Charlotte, Punta Gorda, Brandon, Riverview, and Sun City Center.
Whether you need a quick element swap or a full water heater evaluation, our team provides the expertise and quality service you expect from a local legacy.
Ready to get your hot water back? Contact our professional water heater technicians to schedule a professional tune-up!