What a Toilet Leaking at the Base Is Telling You
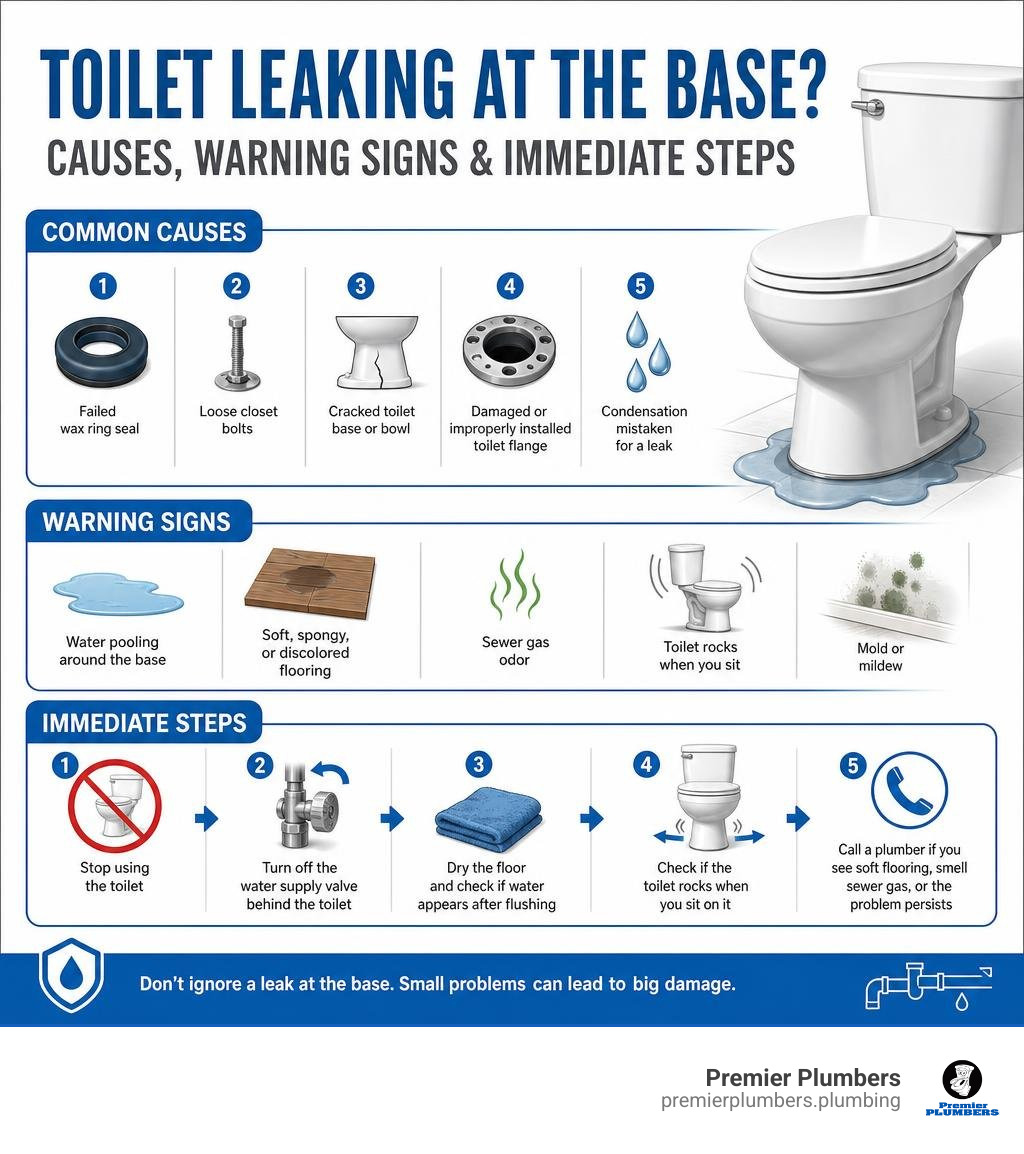
Toilet leaks at the base are almost always caused by one of a small number of fixable problems. Here is a quick overview before we go deeper:
Most common causes:
- Failed wax ring seal
- Loose closet bolts, also called T-bolts or mounting bolts
- Cracked toilet base or bowl
- Damaged or improperly installed toilet flange
- Condensation mistaken for a leak
What to do right now:
- Stop using the toilet immediately
- Turn off the water supply valve behind the toilet
- Dry the floor and check if water appears after flushing
- Check if the toilet rocks when you sit on it
- Call a plumber if you see soft flooring, smell sewer gas, or the problem persists
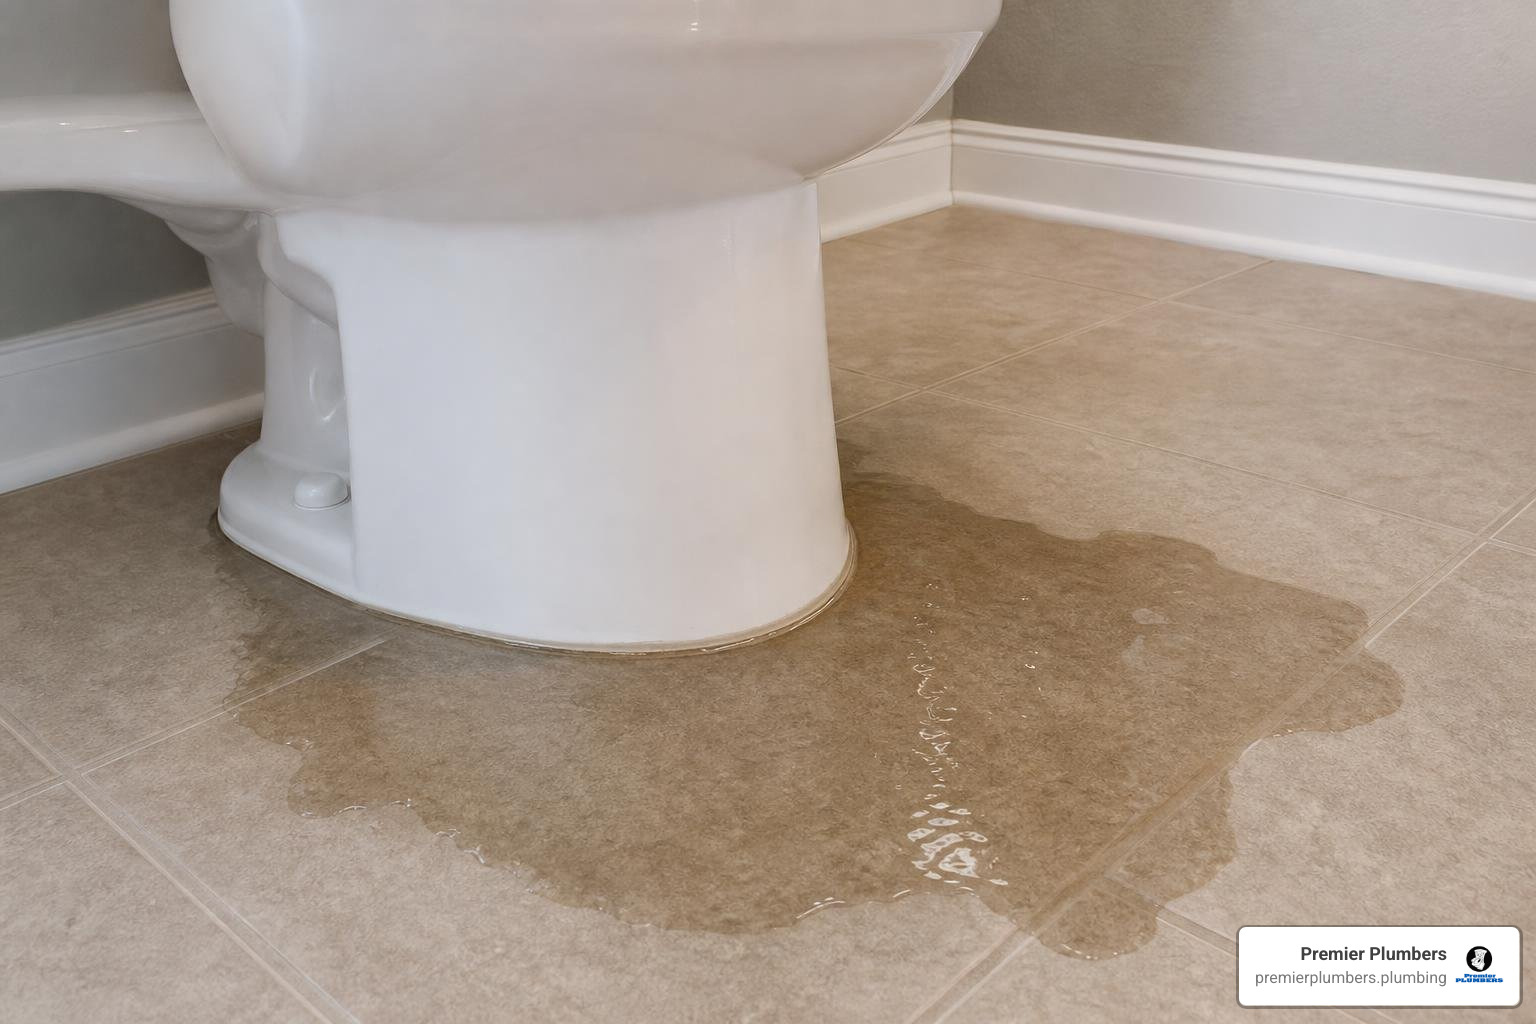
That puddle on your bathroom floor is not something to put off until later. Water leaking from a toilet base may be wastewater from the bowl, which can carry contaminants into the flooring and subfloor. Left alone, even a slow drip can damage wood, encourage mold growth, and turn a simple repair into a much larger restoration project.
The good news is that the fix is often straightforward. Many toilet base leaks trace back to a failed wax ring or loose mounting bolts, both of which a prepared homeowner or plumbing professional can address.
At Premier Plumbers, our experienced team helps homeowners across Southwest Florida identify the source of toilet leaks at the base and protect their bathrooms from avoidable water damage.
What to Do When Your Toilet Leaks at Base
Discovering a pool of water at the bottom of your toilet is never pleasant. Before you start unscrewing parts or purchasing replacement kits, identify exactly where the water is escaping.
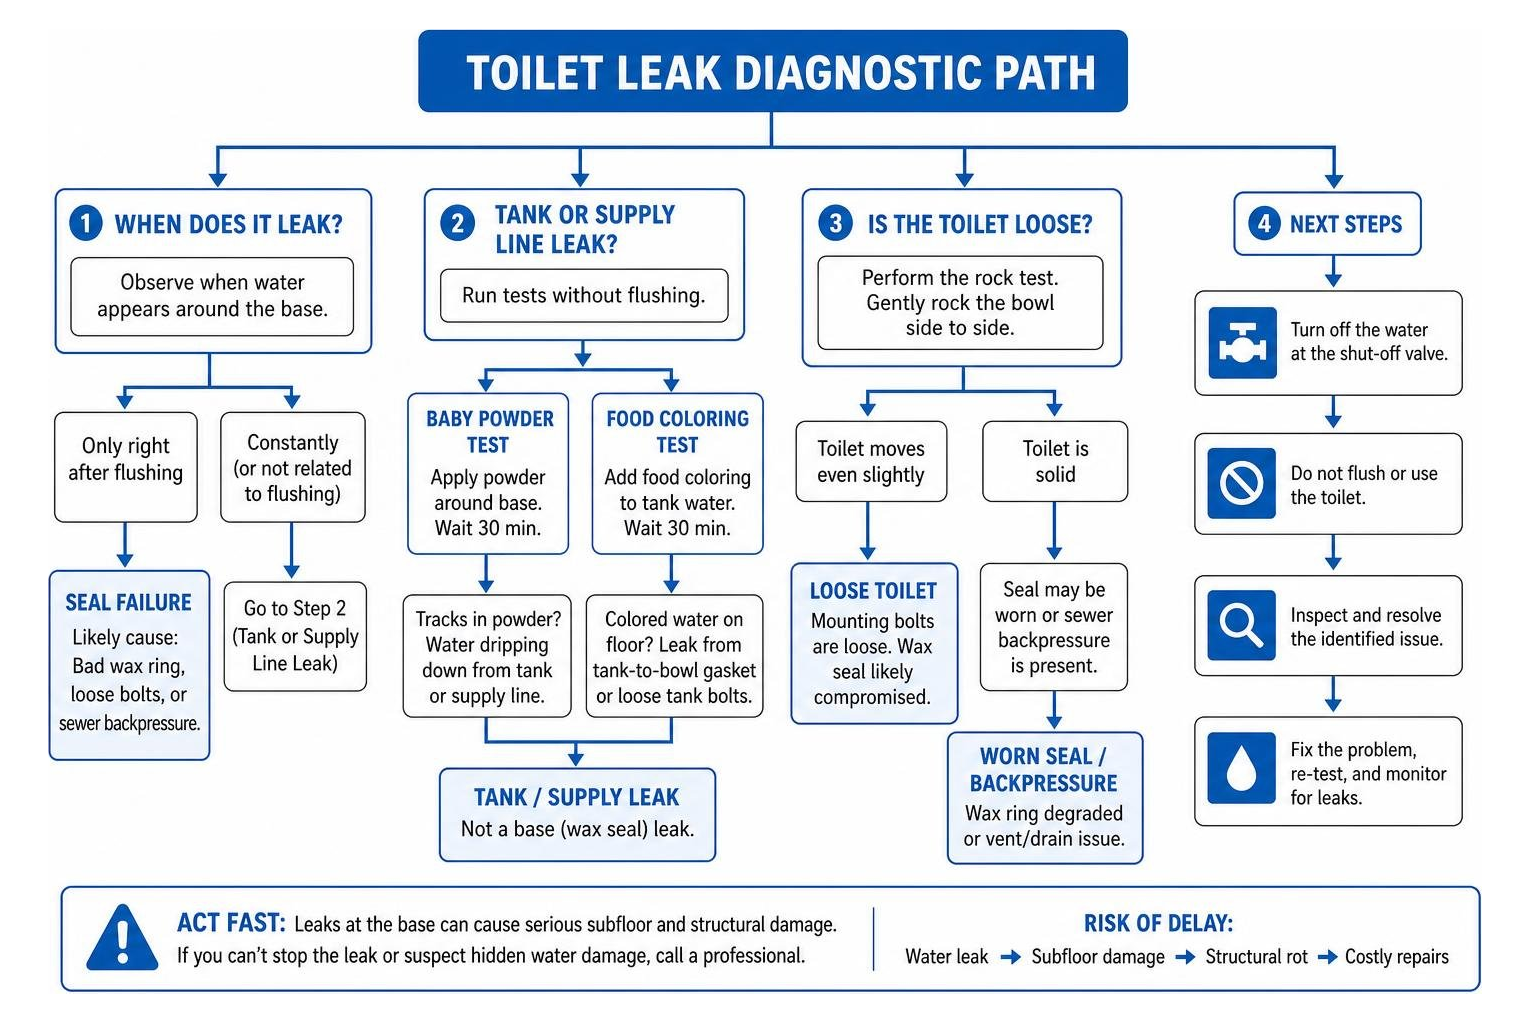
Start by drying the toilet, tank, supply line, and surrounding floor. Then flush once and watch closely for fresh water. This simple check can help distinguish a leak at the base from water traveling down from the tank or supply connection.
Is it a wax ring failure or loose bolts?
The connection between your toilet base and the waste pipe relies on two main components: the metal closet bolts, also called T-bolts, that secure the porcelain to the floor, and a wax ring that forms a pliable, airtight, and watertight seal between the toilet horn and the floor flange.
Over time, these components can fail. If the closet bolts become loose, the toilet may rock or wobble when someone sits on it. This lateral movement can damage the wax seal. Because wax does not return to its original shape after it is compressed or distorted, a rocking toilet can leave a permanent gap that allows wastewater to seep onto the floor.
To check this, try a gentle rock test. Place your hands on the sides of the toilet bowl and gently try to move it from side to side. If the toilet moves even slightly, the mounting bolts may be loose and the wax seal may be compromised.
Why does my toilet only leak when flushed?
If water only pools around the base immediately after you flush, a failed seal is a likely cause. When the toilet is at rest, water remains inside the porcelain bowl and its built-in trap.
During the flush cycle, water and waste move quickly through the bottom outlet into the drainpipe. If the wax ring is degraded, water can escape past the broken seal and onto the bathroom floor. A partial drain blockage or venting problem can also contribute to backup pressure, so persistent leaks deserve a professional inspection.
How to Tell if Your Toilet Leaks at Base or Is Just Sweating
In Florida’s humid climate, especially during hot summer months, what looks like a plumbing leak may be condensation, often called tank sweating.
Cold water entering the toilet tank can cool the porcelain below the dew point of the warm, humid bathroom air. Moisture then condenses on the outside of the tank and bowl and may trickle down to pool around the base.
To rule out condensation, perform these two simple tests:
- The baby powder test: Dry the entire toilet and surrounding floor thoroughly with a towel. Sprinkle a light layer of baby powder around the base of the toilet. Wait 30 minutes without flushing. If tracks form in the powder, water is dripping down from the tank or water supply line above.
- The food coloring test: Add a few drops of dark food coloring to the toilet tank. Do not flush. Let it sit for 30 minutes. If colored water pools on the floor, the leak may be coming from a faulty tank-to-bowl gasket or loose tank bolts rather than the wax ring at the base.
Immediate Steps and the Hidden Dangers of Ignoring a Leak
If you have confirmed that water is leaking from the toilet base, act quickly. Locate the shut-off valve, often called the angle stop, on the wall behind the toilet and turn it clockwise to stop the water flow.
Do not flush or use the toilet again until the issue is resolved. If you cannot stop the leak or suspect water is spreading beneath the flooring, Premier Plumbers can provide emergency plumbing services to help limit further damage.
The rapid timeline of subfloor water damage
Ignoring a leaking toilet base is a race against time. Because many bathrooms in Florida are built on wood joist subfloors, water seeping beneath tile can rot structural materials. Even homes with concrete slab foundations can experience water migration under baseboards, damaged drywall, and ruined adjacent flooring.
| Timeline | Expected Water Damage Progression |
|---|---|
| 1 to 7 Days | Subtle water stains may appear on the floor or on the ceiling directly below the bathroom. Musty odors can begin to develop. |
| 1 to 2 Weeks | Mold and mildew may begin to grow in damp subfloor cavities. Flooring can warp, cup, or discolor. |
| 2 to 4 Weeks | Wood subfloors and joists can soften, creating a spongy feel and requiring more extensive repairs. |
Health hazards of wastewater and sewer gas
Water escaping from a failed wax ring may be contaminated by waste from the bowl. Treat it carefully, keep people and pets away from the area, and clean affected surfaces with appropriate disinfectant once the leak is repaired.
A failed wax ring can also allow unpleasant sewer gases to escape from the drain line. If odors persist, the leak returns, or you experience signs of a drain backup, arrange a professional plumbing inspection.
How to Replace a Wax Ring Step by Step
If you are comfortable with intermediate DIY projects, replacing a wax ring is a task you may be able to tackle over a weekend.
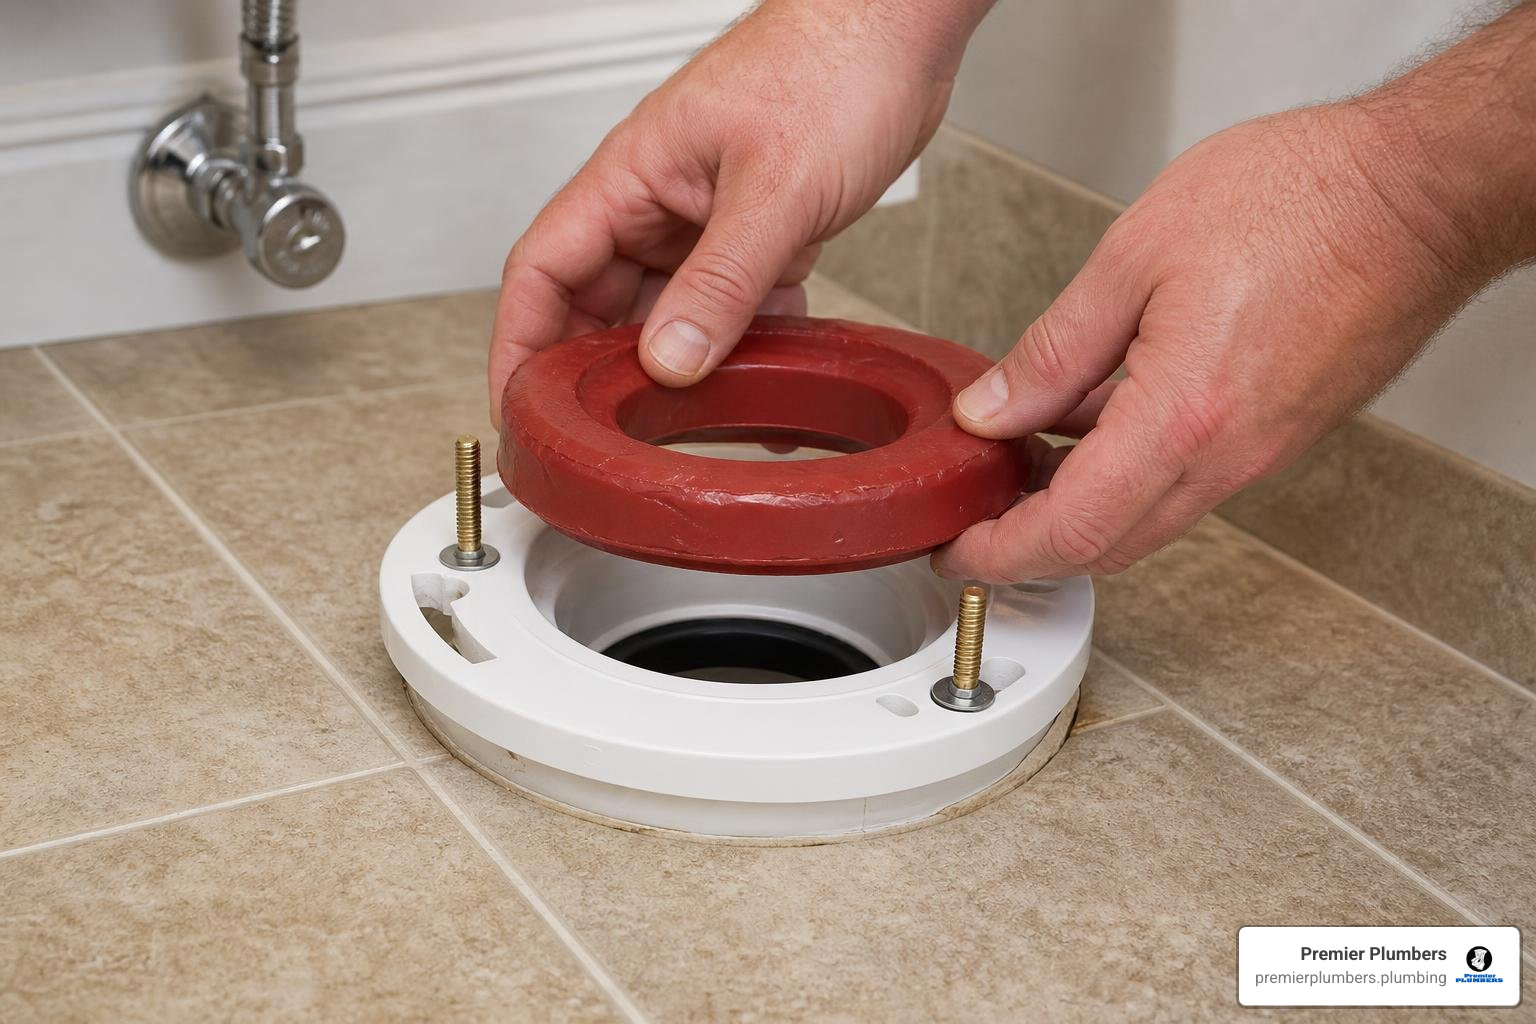
Before beginning, make sure you can safely lift the toilet and recognize when a damaged flange, soft subfloor, or drain issue calls for professional help.
Essential tools and materials for the job
Before you begin, gather the following tools and materials:
- A new high-quality wax ring or a modern wax-free rubber seal
- A set of new brass closet bolts and washers
- An adjustable wrench
- A putty knife for scraping away old wax
- A hacksaw in case old bolts are rusted and need to be cut
- A large sponge and bucket
- Disinfectant cleaner and rags
- A damp rag to plug the sewer line
Removing the toilet and sealing the drain
- Drain the system: Shut off the water supply valve. Flush the toilet and hold the handle down to empty the tank and bowl as much as possible. Use a sponge to remove remaining water from both the tank and bowl.
- Disconnect the lines: Use an adjustable wrench to disconnect the braided water supply line from the fill valve at the bottom of the toilet tank.
- Remove the bolts: Pry off the plastic bolt caps at the base of the toilet. Unscrew the nuts from the closet bolts. If the bolts spin or are too corroded to turn, carefully cut through them just beneath the nut.
- Lift the toilet: Toilets are heavy and fragile, often weighing 50 to 100 pounds. Enlist a helper if needed, lift the toilet straight up off the floor bolts, and place it gently on old towels or blankets to protect the porcelain.
- Plug the drain: Immediately place a damp rag in the open sewer pipe in the floor to limit sewer odors while you work.
Inspecting the flange and installing the new seal
- Clean the surfaces: Use a putty knife to scrape old wax from the bottom of the toilet bowl, called the horn, and the floor flange. Clean both areas thoroughly with disinfectant.
- Inspect the flange: Check the floor flange for cracks or corrosion. In an older home with a cast-iron flange, look closely for hairline fractures. Confirm that the flange sits at the proper height relative to the finished floor.
- Install the new bolts: Slide new brass closet bolts into the slots on the flange, pointing them straight up.
- Apply the new seal: Place the new wax ring directly onto the floor flange or press it firmly onto the toilet outlet, following the product instructions. A wax-free rubber seal can allow easier adjustments.
- Reset the toilet: Remove the damp rag from the drain. Carefully lower the toilet straight down over the new bolts, taking care not to rock or twist it once it contacts the seal.
- Secure and tighten: Sit on the toilet bowl to compress the wax ring. Install the washers and nuts onto the closet bolts, tightening them alternately a little at a time. Do not overtighten, because excess pressure can crack the porcelain base.
Tips for Preventing Future Toilet Leaks at Base
Once your toilet is successfully reinstalled, a few preventative measures can help you avoid repeating the repair.
If the leak, wobble, or drainage issue continues after a new seal is installed, plumbing repair services from Premier Plumbers can help identify whether the flange, drain connection, or surrounding flooring needs attention.
For practical maintenance ideas that can help keep bathroom fixtures working reliably, Premier Plumbers shares toilet repair and water-efficiency tips for homeowners in Sarasota and nearby Florida communities.
If an urgent plumbing problem requires professional help, our article on avoiding predatory emergency plumbing practices explains what to look for when choosing a service provider.
The gentle rock test and tightening bolts
Perform a gentle rock test on your toilets once a year. If you notice even a small amount of movement, tighten the closet bolts slightly. If the toilet sits on uneven tile, do not rely on the bolts alone to keep it steady. Use thin plastic shims under the edges of the base to eliminate wobbling, then trim them flush with a utility knife.
Caulking the base: an early-warning gap
Local plumbing requirements and manufacturer guidance may call for sealing the joint where a toilet meets the floor. Caulk can help prevent water from mopping or splashes from getting beneath the toilet.
Some plumbers leave a small gap in the caulk at the back of the toilet base. This can provide an early warning if a future seal failure allows water to escape, rather than trapping moisture beneath the fixture.
Frequently Asked Questions About Toilet Base Leaks
Can I fix a toilet base leak myself or should I call a plumber?
If you are comfortable lifting heavy objects, using basic hand tools, and dealing with a mess, replacing a wax ring can be an approachable DIY project. However, if you discover a soft subfloor, a broken toilet flange, or a persistent drain problem, it is best to call a licensed plumber.
What are the signs of a damaged toilet flange?
A damaged toilet flange can prevent closet bolts from holding the toilet securely to the floor. Signs of a broken flange include bolts that spin freely without tightening, a toilet that continues to wobble after the nuts are tightened, or persistent leaks despite installing a new wax ring.
A plumbing professional can inspect the flange and surrounding flooring when a leak may be hidden below the finished floor.
How do I know if my subfloor is already rotted?
If a toilet base leak has gone unnoticed for months, the wood beneath the flooring may be structurally compromised. Signs of subfloor rot include:
- A spongy, soft, or bouncy feel when you step near the toilet
- Visible sagging or deflection of the floor around the fixture
- A persistent musty or mold-like odor that does not go away after cleaning
- Water that continues to appear around the base after the toilet has been resealed because moisture is wicking back through the floor or grout
You can test for wood rot by gently probing the subfloor around the flange with an awl or screwdriver once the toilet is removed. If the tool sinks easily into the wood, repair the subfloor before reinstalling the toilet.
Get Professional Help Today
A leaking toilet is more than an inconvenience. It can threaten your home’s structure and create an unsanitary cleanup issue. Premier Plumbers brings a three-generation legacy of plumbing expertise and quality service to every job. Whether you are dealing with a stubborn leak, a damaged flange, or need a complete replacement, contact our professional toilet repair technicians to schedule an inspection and restore peace of mind.